KNF:Hoe werkt Entree Federatie?/en
 Entree Federation: Entree Federation explained
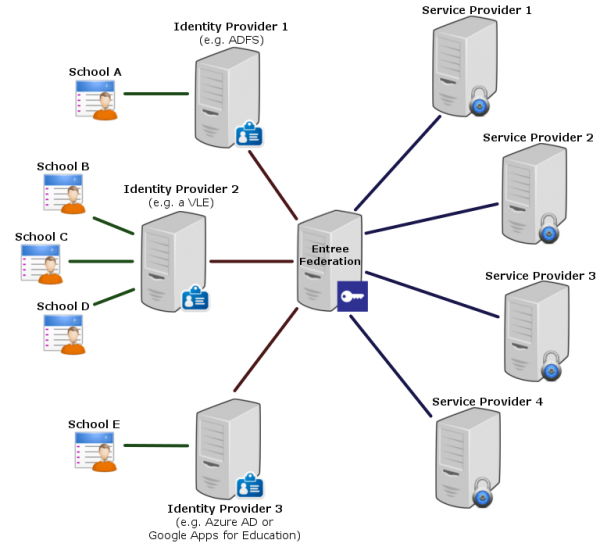
Entree Federation enables Dutch educational users to access a large number of educational services using a single login (als known as Single Sign On or SSO). The federation consists of parties providing educational services or content (Service Providers), administrators of identities (Identity Providers) and the Kennisnet application (Entree Federation).
An Identity Provider is an application that carries out the communication with Entree Federation on behalf of the school. Some examples of Identity Provider applications are:
- Virtual learning environment or VLE (a web-based platform, often used by multiple educational institutions)
- Active Directory Federation Service (ADFS)
- Google Apps for Education
- Azure AD
The Entree Federation application serves as a federative intermediary (or hub) in the authenticationprocess.
Federative Single Sign On has the following advantages:
- User friendliness: users are enabled to get access to multiple educational web applications with a single username/password combination.
- Connected organisations only have to develop and maintain the interface with Entree Federation, instead of multiple interfaces.
- The secure exchange of messages is based on a trust relation between Entree Federation and the connected organisations.
- Just one connection to Entree Federation provides Service Providers with the opportunity to unlock their application to thousands of schools based on reliable identities.
- The educational institutes stay in control over the personal data of its users.
In order to authenticate a user, XML messages are exchanged between the various parties based on the open SAML 2.0 standard (Security Assertion Markup Language). This authenticationprocess is described in more detail below.
Step 1: A user wants to access protected content
A user wants to access protected content of a Service Provider. The latter will request Entree Federation to establish the identity of the user. This identity enables the Service Provider to determine whether or not the user is allowed to access the content.
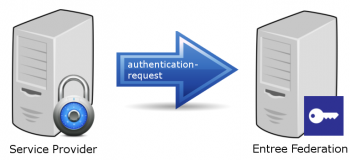
Step 2: The Service Provider sends an authentication request to Entree Federation
The Service Provider sends an authentication request to the server of Entree Federation. This request contains among other things, the Service Provider's unique identifier in the <Issuer>-element.
<AuthnRequest>
   ...
   <Issuer>https://wikiwijs.nl</Issuer>
   ...
</AuthnRequest>
During the initial configuration of the connection the Service Provider and Entree Federation exchanged metadata. These files contain the unique identifiers, endpoints and information about the encryption that is used.
The Service Provider will send the authentication request to the endpoint that is described in the <SingleSignOnService>-element within the Entree Federation metadata.
<EntityDescriptor entityID="aselect.entree.kennisnet.nl">
   ...
   <IDPSSODescriptor>
      ...
      <SingleSignOnService Binding="urn:oasis:names:tc:SAML:2.0:bindings:HTTP-POST"
         Location="https://aselect.entree.kennisnet.nl/openaselect/profiles/saml2/sso/web"/>
      ...
   </IDPSSODescriptor>
</EntityDescriptor>
In this example HTTP-POST will be used as the communications protocol (also called binding). Each entity can support several bindings, each one of these bindings will be listed in it's metadata. Entree Federation also supports the HTTP-Redirect and HTTP-Artifact bindings.
Step 3: Entree Federation validates the athentication request from the Service Provider
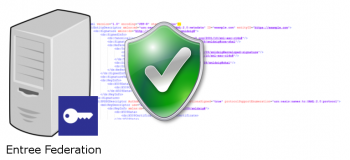
The Entree Federation application will validate the authentication request on the basis of the Service Provider's metadata. For example it will check if the entityID in the metadata matches the value in the <Issuer> element of the authentication request.
Step 4: The user selects the Identity Provider
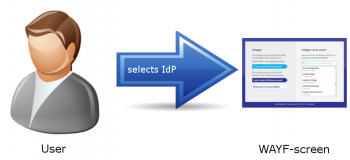
The user will be redirected to the Entree Federation's WAYF-screen (Where Are You From). The user will select his school and with that the corresponding Identity Provider.
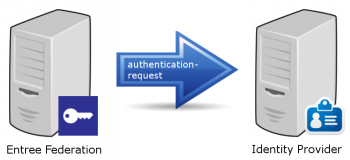
Step 5: Entree Federation sends an authentication request to the Identity Provider
Entree Federation sends an authentication request to the Identity Provider, similar to the request that was send to Entree Federation by the Service Provider. However the element <Issuer> will contain the identifier of Entree Federation, since in this instance Entree Federation is the issuer of the request.
<AuthnRequest>
   ...
   <Issuer>aselect.entree.kennisnet.nl</Issuer>
   ...
</AuthnRequest>
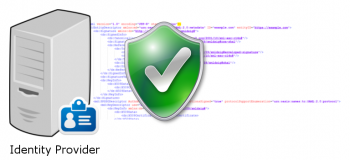
Step 6: The Identity Provider validates the authentication request from Entree Federation
Just like Entree Federation validated the authentication request send by the Service Provider, the Identity Provider will now validate the autentication request made by Entree Federation. This is also based on the metadata both parties have exchanged during the initial configuration of the connection.
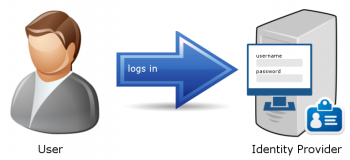
Step 7: The Identity Provider authenticates the user
The Identity Provider will require the user to log in, unless the user already has a current session with the Identity Provider. In that case the authentication will occur automatic.
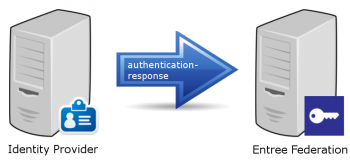
Step 8: The Identity Provider sends a response to Entree Federation
The Identity Provider sends a SAML response message to Entree Federation. This message contains an assertion about the identity of the user. The message will be send to the endpoint listed in the <AssertionConsumerService>-element in the metadata of Entree Federation:
<EntityDescriptor entityID="aselect.entree.kennisnet.nl">
   ...
   <SPSSODescriptor>
      ...
      <AssertionConsumerService Binding="urn:oasis:names:tc:SAML:2.0:bindings:HTTP-POST"
         Location="https://aselect-s.entree.kennisnet.nl/openaselect/profiles/saml2/sp/sso/web"/>
      ...
   </SPSSODescriptor>
</EntityDescriptor>
Key elements in the SAML response are:
- The <Issuer> of the message, in this case the Identity Provider.
- The <StatusCode> indicating the result of the authentication with the Identity Provider.
- The <NameID>-element containing the subject, in this case the user, the authentication applies to.
- <AttributeStatement> contains the attributes with the personal data. The values in the uid-attribute and the <NameID>-element have to be similar.
<Response>
   ...
   <Issuer>petteflatcollege.nl</Issuer>
   <Status>
      <StatusCode Value="urn:oasis:names:tc:SAML:2.0:status:Success"/>
   </Status>
   ...
   <Assertion>
      <Subject>
         <NameID>pietjepukkelen@petteflatcollege</NameID>
         ...
      </Subject>
      ...
      <AttributeStatement>
         <Attribute Name="uid">
            <AttributeValue>pietjepukkelen@petteflatcollege</AttributeValue>
         </Attribute>
         <Attribute Name="employeeNumber">
            <AttributeValue>1234</AttributeValue>
         </Attribute>
         <Attribute Name="givenName">
            <AttributeValue>Pietje</AttributeValue>
         </Attribute>
         <Attribute Name="mail">
            <AttributeValue>p.pukkelen@petteflatcollege.nl</AttributeValue>
         </Attribute>
         <Attribute Name="nlEduPersonHomeOrganizationId">
            <AttributeValue>99ZZ03</AttributeValue>
         </Attribute>
         ...
      </AttributeStatement>
      ...
   </Assertion>
</Response>
Step 9: Entree Federation filters the attributes and encrypts the uid
Several operations and checks are performed by Entree Federation before the data is propagated to the Service Provider:
- The value of the employeeNumber-attribute and the part before the @ sign in the uid-attribute are combined and encrypted. Subsequently the realm in the uid (in this case @petteflatcollege) will be appended. This results in a unique ID that can be used by the Service Provider to identify the user.
- Based on the value of the nlEduPersonHomeOrganizationId-attribute, Entree Federation performs a check to see if there's a known link between a school and the Identity Provider.
- It is determined which attributes the school has approved to propagate to the Service Provider and the attributes are filtered accordingly.
- The blacklist will be consulted to determine if users associated with the school are allowed to access the Service Provider.
- If the user has an activated digicode that is linked to the Service Provider, it will be appended to the set of attributes.
Step 10: Entree Federation sends an answer to the Service Provider
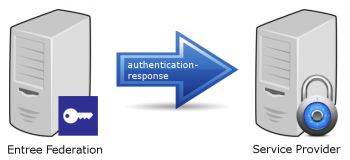
Entree Federation sends the custom SAML response to the Service Provider. The response will be send to the endpoint listed in the <AssertionConsumerService>-element in the metadata of the Service Provider.
There are several differences between this SAML response and the one send by the Identity Provider to Entree Federation (described in step 8):
- The <Issuer>-element contains the value aselect.entree.kennisnet.nl, since the message is send by the Entree Federation application.
- The <NameID>-element and the uid-attribute now both contain the encrypted value of the combined uid and employeeNumber attributes.
- The employeeNumber-attribute won't be send to any Service Provider and is removed from the SAML message.
- In this example we presume the school has not approved the propagation of the mail-attribute to the Service Provider. Therefore the attribute does not appear in the SAML response.
- We also presume the user has an activated digicode linked to this Service Provider. It has been appended as the DL_IDSP_Licencecode2017-attribute.
<Response>
   ...
   <Issuer>aselect.entree.kennisnet.nl</Issuer>
   <Status>
      <StatusCode Value="urn:oasis:names:tc:SAML:2.0:status:Success"/>
   </Status>
   ...
   <Assertion>
      <Subject>
         <NameID>3bf03m4ea2kfe457c6@petteflatcollege</NameID>
         ...
      </Subject>
      ...
      <AttributeStatement>
         <Attribute Name="uid">
            <AttributeValue>3bf03m4ea2kfe457c6@petteflatcollege</AttributeValue>
         </Attribute>
         <Attribute Name="givenName">
            <AttributeValue>Pietje</AttributeValue>
         </Attribute>
         <Attribute Name="nlEduPersonHomeOrganizationId">
            <AttributeValue>99ZZ03</AttributeValue>
         </Attribute>
         <Attribute Name="DL_IDSP_Licencecode2017">
            <AttributeValue>1234-abcd-5678</AttributeValue>
         </Attribute>

         ...
      </AttributeStatement>
      ...
   </Assertion>
</Response>
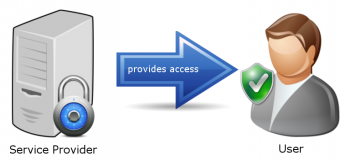
Step 11: The Service Provider authorises the user
The SAML response message send by the Entree Federation application will be validated by the Service Provider by means of the value of the <Issuer>-element. The Service Provider will now decide whether or not the user is allowed to access the protected content based on one or more attributes. Some examples of authorisation methods are:
- The Servie Provider utilises school based licences and authorises the user by means of the value of the nlEduPersonHomeOrganizationId-attribute.
- Individual users have a license and access is granted based on the user's unique identifier in the uid-attribute.
- The Service Provider uses digicodes to authorise and will validate the user based on the digicode attribute.
The Service Provider defines the authoristion method and will therefore establish which attributes will be used to provide access.
